
Nextflow: designing our pipeline
Our goal
We want to process the raw output of whole genome shotgun experiments performed on bacterial isolates.
Our input is a directory with the FASTQ files (paired end), and we can start drafting that we require files
having a name like SampleName_R1.fastq.gz (and its paired SampleName_R2.fastq.gz). The user is expected to
provide - in our quest for a simple pipeline - only two parameters:
- the input directory, that must contains the paired end FASTQ files
- the output directory, that will be created and populated (optional: a default will be used if not specified)
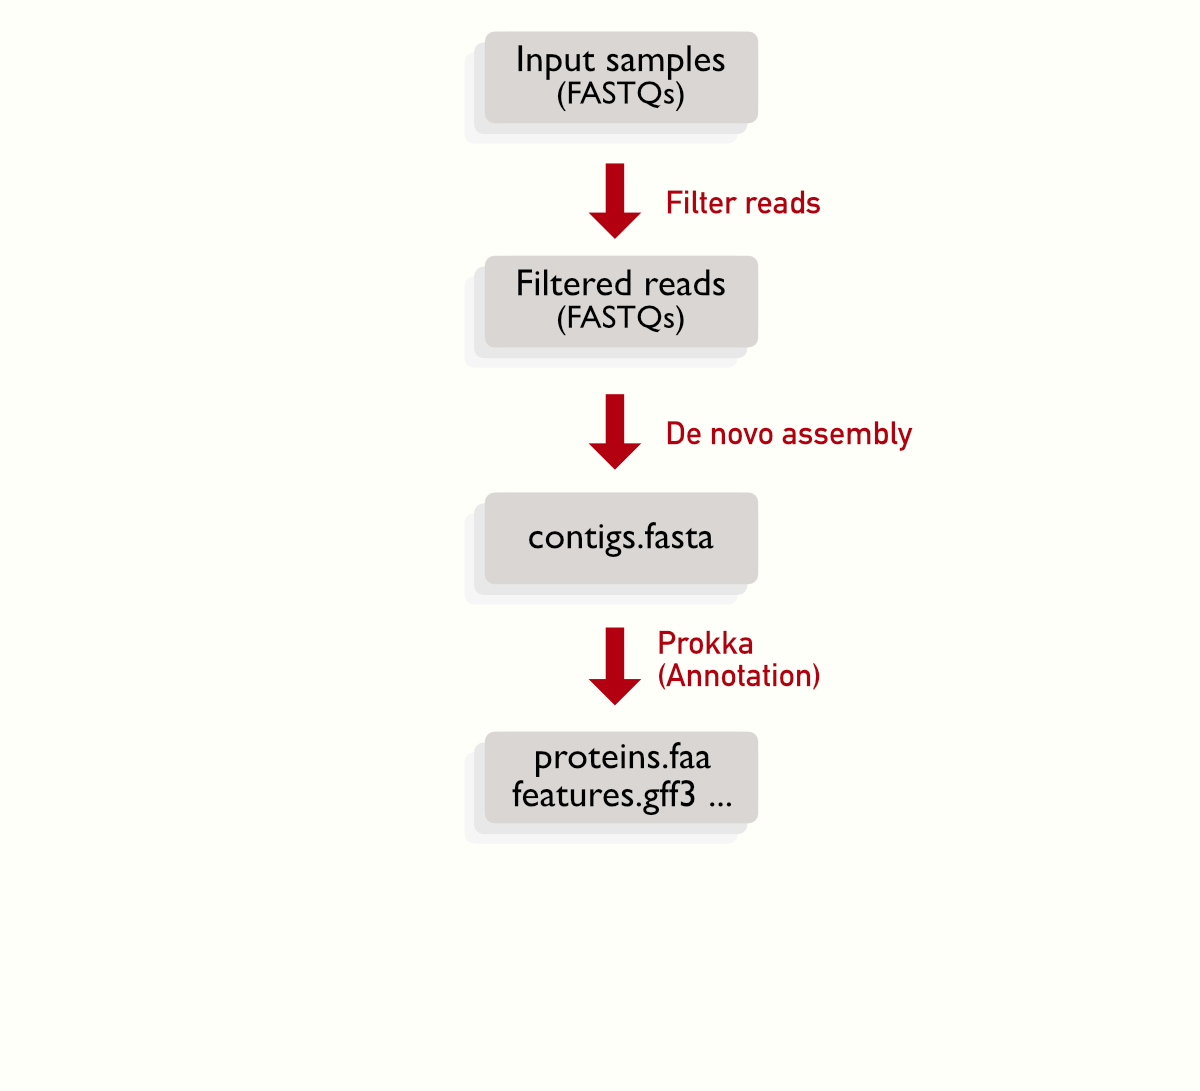
We want to assemble each sample (producing the FASTA file with the contigs, we will use shovill), annotate the contigs (with a general annotation program, Prokka, and an AMR detection tool, Abricate). So far we are doing some common steps from the torstyverse.
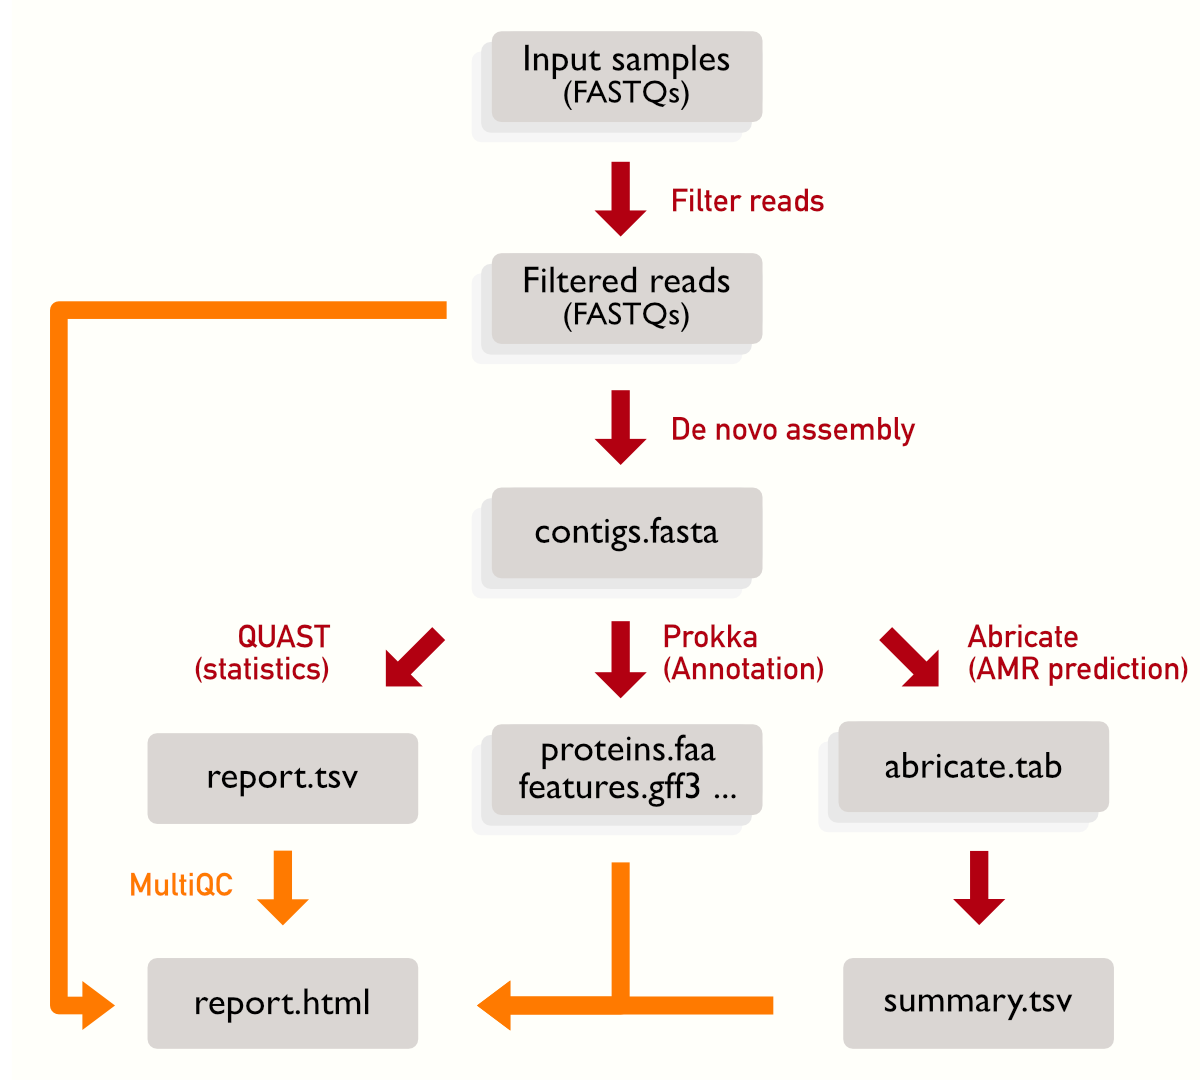
We also want to collect some statistics and summaries: a report from the quality filtering tool (fastp), statistics on the assemblies (QUAST).
There is a fantastic tool to generate a report: MultiQC, which natively supports fastp, prokka and QUAST. We will need to do some manual manipulation to add also Abricate.
First steps
Each sample is represanted by a pair of files, and there are some steps that can be linearly (one block after the other), for example the quality filtering, assembly and annotation. The multiple boxes represents the multiple files to be processed.
Collecting steps
There are some steps where we need to wait all the samples to be processed: the summary from Abricate (which is produced using all the Abricate outputs), QUAST (which will compare all the assemblies) and finally MultiQC that collects output from multiple steps. You can see that the summaries have a single, rather than multiple, box representing it.
But we don’t reinvent the wheel
If your goal is to have a powerful tool to analyse loads of isolates using several tools, Robert Petit III developed Bactopia, that is also based on Nextflow DSL2!
This tutorial aims at giving a kick start on workflow development using Nextflow, and sparkling interest on learning Nextflow more.
The programme
-
 A de novo assembly pipeline: we will design a simple workflow to assemble and annotate microbial genomes
 -
 Gathering the tools: we will use Miniconda to gather our required tools, and generate Docker and Singularity containers manually (Nextflow can automate this step, but it’s good to practice manually first)
 -
 First steps with Nextflow: we will install Nextflow and run a couple of test scripts
 -
 The de novo pipeline in Nextflow: we will implement our pipeline in Nextflow